Thursday, August 16, 2012

Giveaway!!!

So I know I haven't blogged in a long time -- My art has kinda been at a stand still for awhile :(. I think about it everyday and I have been exercising my ART BRAIN with cloth paper and scissors mag and Green Craft mag. I have a ton of ideas and I have become a Pinterest addict (as are many of you I bet :) ). But I had to share this Giveaway!!!

http://soulflowerbuds.blogspot.com/2012/08/bag-swag-giveaway.html#

Thursday, April 28, 2011

What have I been up too!!!?

I am still making envelopes out of every piece of paper I can find :) I am also currently working on making art journals and scrapbooking journals. Of course I am always making entries into my own art journal.

For easter I made the best fun ever! One word CASCARONES. My kids had the most fun breaking eggs on everyones head. Even I had fun making them.


I used different techniques when coloring them and I really liked the way the all came out.

I followed these instructions when I made them.

http://youtu.be/WpzPa4VNl-I

Wednesday, March 16, 2011

Upcycled Envelopes

So this was my next project!!!
I saw these on etsy and I had to have them but I wasn't going to buy them. So I went through my electronic file system (brain) and remembered back to my graphic design days and pulled out the old books and started making my own envelopes!

Here is the process taught to me by my instructor Pam!

Supplies: magazines, books, junk mail (any paper), card or note you want to mail, scissors, glue stick

STEP ONE:
I am using a large Atlas so I cut the page in half and made sure that there is at least 1/2 inch on the sides.
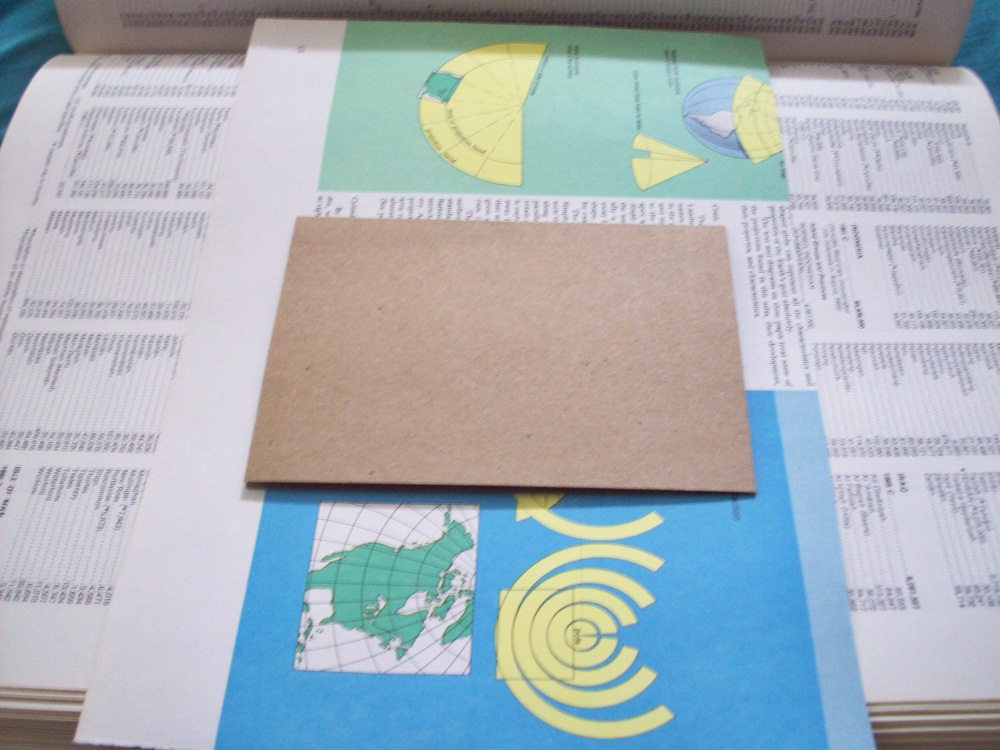


STEP TWO:
Fold the large sides to the size of your note - mine is a A2 card.


STEP THREE:
Unfold and then fold the small sides in.


STEP FOUR:
Unfold and then fold the large sides down again leaving the small sides unfolded. Next cut the corners at an angle as seen in pic on all four corners. Using the small side fold as a guide.


STEP FIVE:
As you can see in the pic cut the small side tabs off each of the end pieces, leaving them on the middle. These will be what you glue to the bottom tab to enclose your envelope.


STEP SIX:
Next fold the side tabs in and add glue and fold up the bottom. Before I glued I also trimmed the top flap and added a decorative edge.


STEP SEVEN:
Add your card and mail!!! For a full picture envelope you may need to add a white label to the front to write your address on.


ENJOY YOURSELF!!!

Sunday, January 30, 2011

Upcycled Wool Dryer Balls


This is my next project!!! 100% Wool sweaters destined for the dyer. These seem to be the next big thing and I am not about to pay $20 for 3 balls. But I must confess the whole deconstruction of the sweater is very time consuming and yes it is worth it to me. I just love the idea of reusing an item and giving it a whole new life. I will be posting detailed DIY instructions to let you know how many balls I get from one sweater and what my finished project looks like. Until then happy upcycling your own projects!!


Instructions
So I got 6 balls from this project!!
I used this website for my project - I just didn't use the roving.

http://greeneyed.com/2010/10/diy-dryer-balls/

Thank you!!

Saturday, January 29, 2011

Yarn Wreath


What You Need:
1. Straw Wreath
2. Yarn
3. Felt or silk flowers would also work - You could use anything to your hearts desire
4. Ribbon, Material strips, Lace - anything to hang the wreath with

This was my first attempt at making a yarn wreath. Some of the things on this are upcycled and you could do the whole thing as an upcycle project. I had to purchase some of the items. The wreath is a straw wreath that I had from other projects I have attempted and never finished. For the flowers I used felt, I have a ton of this - stacks of it like construction paper. You never know when the kids need a craft or school project. I purchased the yarn and the felt letters.


You can use glue, but I just started wrapping tucking the end in as I went. It takes awhile and my arms did cramp. But I found my rhythm and an extra set of hands helps definitely. I didn't try to make the yarn line up straight, I just went for it and I like the way it looked in the end.


I used yarn from Walmart in mustard yellow. I just love this color and I really like the way it looks with Red and Pink. It really makes the color pop.


To make the flowers you can use any material. You just need to cut a circle and at any point start cutting it around and around into one strip with a small circle left at the end to glue. Starting at the end without the circle start wrapping it around as tight or as loose as you want. Secure it with glue on the circle.


Using ribbon you could wrap it all the way around or like I did. You could also use a smaller width and wrap it around for contrasting color with the yellow. Let you imagination run wild. This is one of those projects you could do anything. Happy Crafting!!

Friday, January 14, 2011

Best Banana Cake

So today I made a banana cake. You might be saying how is this related to upcycling.......
Well I used the old brown bananas that my kids did not eat :)

This is the recipe I used. Thank you food.com!!!
http://www.food.com/recipe/best-ever-banana-cake-with-cream-cheese-frosting-67256

I made a few changes to the recipe.
1. I added 1 box of instant vanilla pudding
2. I did 1 cup sugar and 1 1/8 cup brown sugar
3. I added 1 teaspoon lemon zest
4. I made chocolate cream cheese frosting .... yummy.

This cake is so yummy, yummy, yummy.


Thursday, January 6, 2011

Upcycled Book Art

Here is how I started. I have a ton of books. I love to read -- thanks to digital I know have thousands in one device. What to do with all of those old books--this is my first idea. I covered old canvas paintings I had stored (I didn't really like the painting I did on them). I used Acrylic medium and "glued" the strips over the surface of the canvas -- including the sides.

After they dried. I did two coats of clear gesso.

Now only my imagination and some paint can lead me to the final product.
More to come..........